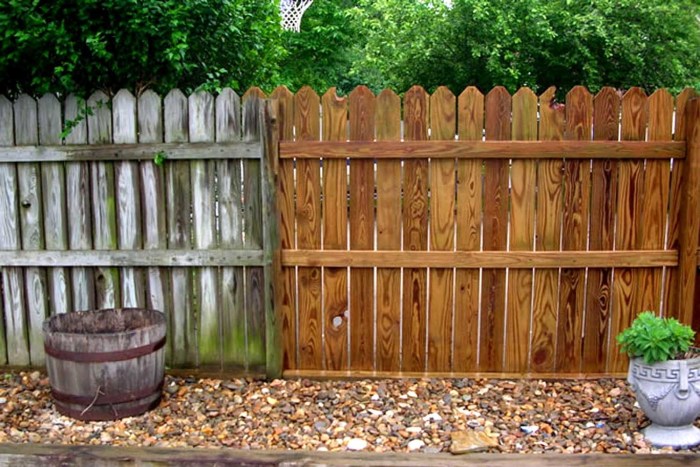
How’s your wooden fence looking after the winter season we have just had in Toronto? Hopefully, not too bad.
Snow has the effect of making even ordinary landscapes look serene and beautiful. But for your wooden fences, it hardly ever feels like a winter wonderland, even with all your winter preparation efforts.
The steep dip in temperature and the eventual thawing warps wood, causing it to shed that protective seal you had wisely protected it with. The wooden fence that emerges after winter often looks grey, tired, and old.
This year’s winter was especially brutal. It was early, too. Not since 1951 has Toronto received its first heavy snowfall that early in the season. So now that it’s spring, how can you revive your wooden fence to look its best again?
How To Restore Your Snow-Battered Wooden Fence
Even though spring comes with rain in Toronto, it is now warm enough to give your fence the attention it desperately needs. Here are some fencing tips to help renew your wooden fence and bring back its rich, warm glow:
1. Check the fence’s stability
Before you start any restoration work, it is important to first check the stability of the fence. The freezing of the ground can cause the soil to shift, which makes the fence’s posts loose and unstable.
Excessive moisture can also cause the posts footing to rot. The rot isn’t easy to spot if you don’t physically test the strength of the fence. As any fencing expert will tell you, if the posts aren’t strong, the whole fence is unsafe.
After you test all posts, you should be able to see which ones are shaky and which ones need to be repaired. As you sink new ones, ensure they are deep enough to get past the frost line. Only then can you be sure the posts will not loosen when the soil shifts again next winter.
2. Give the fence a good power wash

Looking at your wooden fence’s tired, grey appearance, you may doubt it will ever look as good as it did before winter. But it will. After making sure the fence is stable, take out your power washer and give the fence a thorough clean.
Power washing will remove any mold, dirt, and grime that may have built up as well as strip away dead cells. What you want is to strip the wood down to the fresh layer underneath.
3. Replace rusted nails and tighten loose boards
With the fence clean and well dried, check to see if the power wash hasn’t exposed any rusted nails or made some boards loose. Replace the rusted nails. If there are any broken boards or battens, glue and tighten them.
4. Protect the fence with a wood preservative
Now it’s time to protect the wood with a good wood preservative. Apply several coats of the preservative, paying particular attention to the base of the posts, which is the one part of your fence that’s most prone to rot.
5. Seal the wood with an oil stain
Staining your fence will ensure the wood looks freshly restored for longer. If you want the wood to look as natural as possible, with its natural grain showing through, choose a semi-transparent oil seal.
Remember, without added protection, the sun is going to bleach the wood’s natural colors before long. So choose a stain that has an ultraviolet inhibitor. It also helps if the sealer has mildew protection.
Work the sealer into all the corners and board joints. Any spots you leave unsealed exposes the wood to moisture damage and discoloration.
Wooden Fencing Requires Regular Maintenance
Your wooden fence should now be looking as good as new. But, being wood, you will still need to regularly maintain it to fix issues before they compromise the fence’s stability and good looks.
If the fence restoration and maintenance job is too demanding for you, or you just don’t have the time, remember Jay’s Fencing is here for you.
At Jay’s Fencing, we are experts at installing, maintaining, and repairing all types of fences, including vinyl and chain-link fences. Contact us for a free consultation.

